Follow our journey

Follow our journey as we conquer our first dig and the various projects we take on to make a home sweet home.

Saturday, July 14, 2012

Cargo Tree House - Sketchup 3D Challenge


It has been far too long since I've posted anything. To get out of the daily grind style work, I decided to compete in the Sketchup 3D Challenge #147 - Tree House. The Sketchup 3D challenge is a series of model building competitions which are about a week long, giving everyone a theme to model how they wish. The rules are pretty simple, and require everyone to make their own components from scratch rather than download from the 3D Warehouse.


Link to my model (if you have sketchup - the basic program is free!): http://sketchup.google.com/3dwarehouse/details?mid=53e9d3b806db35e7843d9c61afebe13c

I learned about this challenge on 7/13, the day it was due, and started work on it around 2pm and finished up about midnight. I was supposed to take a half day off, so I camped out in a coffee shop until my Wife and carpool buddy was ready to go home. Besides driving 30 - 45 minutes home, I worked on this nonstop and forgot to eat dinner.

This challenge, as you have guessed by now, is to draw a 3D model of a Tree House. Mine features a 20' x 9' main structure, with a 1/2 wrap around porch. The main structure is about the size of a shipping container (though a little taller).

 I did a google search for the worlds biggest tree (go big or go home), and I found General Sherman: http://en.wikipedia.org/wiki/General_Sherman_(tree) which is Giant Sequoia about 25' diameter.

There are a lot of small houses around the internet, from this one on Arch Daily: http://www.archdaily.com/152505/keret-house-centrala/ to the Wee Houses: http://weehouse.com/. I didn't have much time for precedence studies, and basically just banged it out as quickly as possible.

I was able to fit: A small kitchen with lunch counter, combined living room / bedroom (folding futon), a bathroom with sink, toilet, shower pan. 

The columns are primarily paired beams with spacers between. I drew them as having glass inserts between the spacers. Why not?

I did some draft renders showing sunlight using ArielVision's plugin on a 30 day trial. Also, just some regular "export 2D image" shots from sketchup.

Materials chosen were primarily readily available. Simple planks for cladding, framing lumber, glass, some small ceramic tile. The roof is copper (a little harder to get and pricey). For textures not from sketchup, I downloaded images from: CG Textures

Here are some more renderings (click to enlarge): 

Kitchen


Kitchen with glass-inset, paired beam spacers (TM) (I challenge you to come up with a better description for the beams!)

Roof Framing

Paperstone countertop with routed drain grooves

Clerestory Windows

Side Elevation

Front corner pespective

Front perspective from above

"Plan" view*

Front "Section"*

*I didn't take the time to properly set up the plan and section views.

Let me know what you think!


I got dimensions and other imforation from: 

*PS: Working on creating separate logins to the blog so you can tell which one of us posted something - JDF.

Wednesday, April 18, 2012

Izzy and Murphy playing Tag

Most recently, my cat and dog have decided that they are friends, and play often. This is my first successful attempt at video taping them run around the house. 

I am posting for my friend Jean and Ray the Blind Dog.

Enjoy!

Rachel

Lettuce, Spinach, and Bush Beans, Oh My!

It was so disappointing last year to see our lovely big yard go to waste. We just didn't have the time or the money to invest in it.

I really didn't want to miss out again on having a garden this year.So we had to at least get one raised bed ready for late April....And I'm happy to report that we made the deadline!

Earlier in the week, we went by Home Depot and purchased two of these cedar bed kits.
We had toyed around with the idea of purchasing and building the cedar beds (to fill a 15'x6' spot) from scratch (around $500-700 dollars for material and hardware)...and decided that these '$80 dollars a pop' cedar beds could do the trick for a few years. The only downside is that it reaches a full height of about 14 inches above the ground. I had been hoping to go a little higher to keep the animals out, but we will see how this works. I may build a net system to cover my little seedlings.
 
Josh happened to be out of town and I was bored, so I got up early Saturday and started the assembly process. The bed goes together really well. The leveling of the ground and digging of the trenches took me much longer. All in all, it took me about 5 hours (the frame took about 20 minutes). Oh, and as usual, the animals were O' So Helpful....


This is how large the bed will be when we add the second half. Got to get rid of that pesky stump first...


 Once Josh got back in to town, he helped me mix the soil and spread it out in the bed. I used a mixture of the existing clay/soil, sand, and garden soil for vegetables. I have already planted my spinach seeds as well as my salad mix seeds. My indoor seeds are also all set up. That includes lavender and bell peppers. In about a week or two, I will be planting the bush beans and the cucumbers, right after the last frost date (I'm guessing, since the weather has been so funky).

So, it's coming together and I can't wait to get the second bed in so I can have my herb garden. I will definitely be posting pictures of our fresh veggies this summer. Did I mention that we got 10 bags of mulch from the local boyscout troop? Woohoo! I will post pictures of what we do with that....even if it is just leaving them neatly stack in our driveway, Har Har.


Cheers,
 
Rachel


Tuesday, April 17, 2012

Finally Getting Around to Yard Work

That's right. Yard work. It's only taken us a year, but we finally got around to changing things. Mostly this first year, we've focused on getting furniture into the house, which is expensive when you move in with 2 chairs, a bed, 3 dressers, and a tv. 

We were noticing that our front yard near the driveway looked...well, pretty lame and sad. Without spending oodles of money, we came up with a relatively cheap idea to make our yard look a little more decent. For some unknown reason to us, the person we bought the house from had placed tiny bushes all along both sides of the driveway. Real cute, until you opened a car door and slammed them, or perhaps stepped on them and broke them into a million pieces (ahem, Josh). So we went ahead and pulled those bushes up. The mulch beds that they were in had begun to be taken over by the grass and clover from the main part of the yard. Not so pretty....
Home Depot Trip Findings
The "Not so Pretty" Front Yard

Attempting to make a straight line
Attempting to level

Izzy helping


Adding the weedblock

Adding borders and gravel


Ta Da!

So, it's still a little rough around the edges, but I think we are making progress!


Next up for the front yard:
- New mulch for the beds closest to the house
- Flower bed around the tree in the yard
- Attempting to remove clover from yard and replace with grass

We will see what happens.....


Cheers,

Rachel

Monday, January 30, 2012

The Family Room Gets A New Look

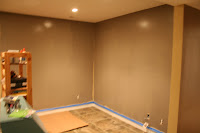
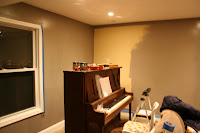
Recently, Josh and I have been going over ideas for the family room layout, color, etc. and finally started the project.


Good bye gold paint, it's been swell. We got a few shelves and a rug for CB2 and absolutely love them. Check out the gray paint.


The animals were pretty good at helping with the shelves.


TA DA!
And thats a wrap!


Cheers,

Rachel