It has been far too long since I've posted anything. To get out of
the daily grind style work, I decided to compete in the Sketchup 3D Challenge
#147 - Tree House. The Sketchup 3D challenge is a series of
model building competitions which are about a week long, giving
everyone a theme to model how they wish. The rules are pretty simple, and
require everyone to make their own components from scratch rather than download
from the 3D Warehouse.
Link to 3D Challenge: http://sketchup3dchallenge.blogspot.com/2012/07/sketchup-3d-challenge-147-tree-house.html
Link to my model (if you have sketchup - the basic program is free!): http://sketchup.google.com/3dwarehouse/details?mid=53e9d3b806db35e7843d9c61afebe13c
I learned about
this challenge on 7/13, the day it was due, and started work on it around 2pm
and finished up about midnight. I was supposed to take a half day off, so I
camped out in a coffee shop until my Wife and carpool buddy was ready to go
home. Besides driving 30 - 45 minutes home, I worked on this nonstop and
forgot to eat dinner.
This challenge, as
you have guessed by now, is to draw a 3D model of a Tree House. Mine features a
20' x 9' main structure, with a 1/2 wrap around porch. The main structure is
about the size of a shipping container (though a little taller).
I did a
google search for the worlds biggest tree (go big or go home), and I found
General Sherman: http://en.wikipedia.org/wiki/General_Sherman_(tree) which
is Giant Sequoia about 25' diameter.
There are a lot of
small houses around the internet, from this one on Arch Daily: http://www.archdaily.com/152505/keret-house-centrala/ to
the Wee Houses: http://weehouse.com/. I didn't have much time for precedence studies, and basically just banged it out as quickly as possible.
Here are some more renderings (click to enlarge):

Kitchen

Kitchen with glass-inset, paired beam spacers (TM) (I challenge you to come up with a better description for the beams!)

Roof Framing

Paperstone countertop with routed drain grooves

Clerestory Windows

Side Elevation
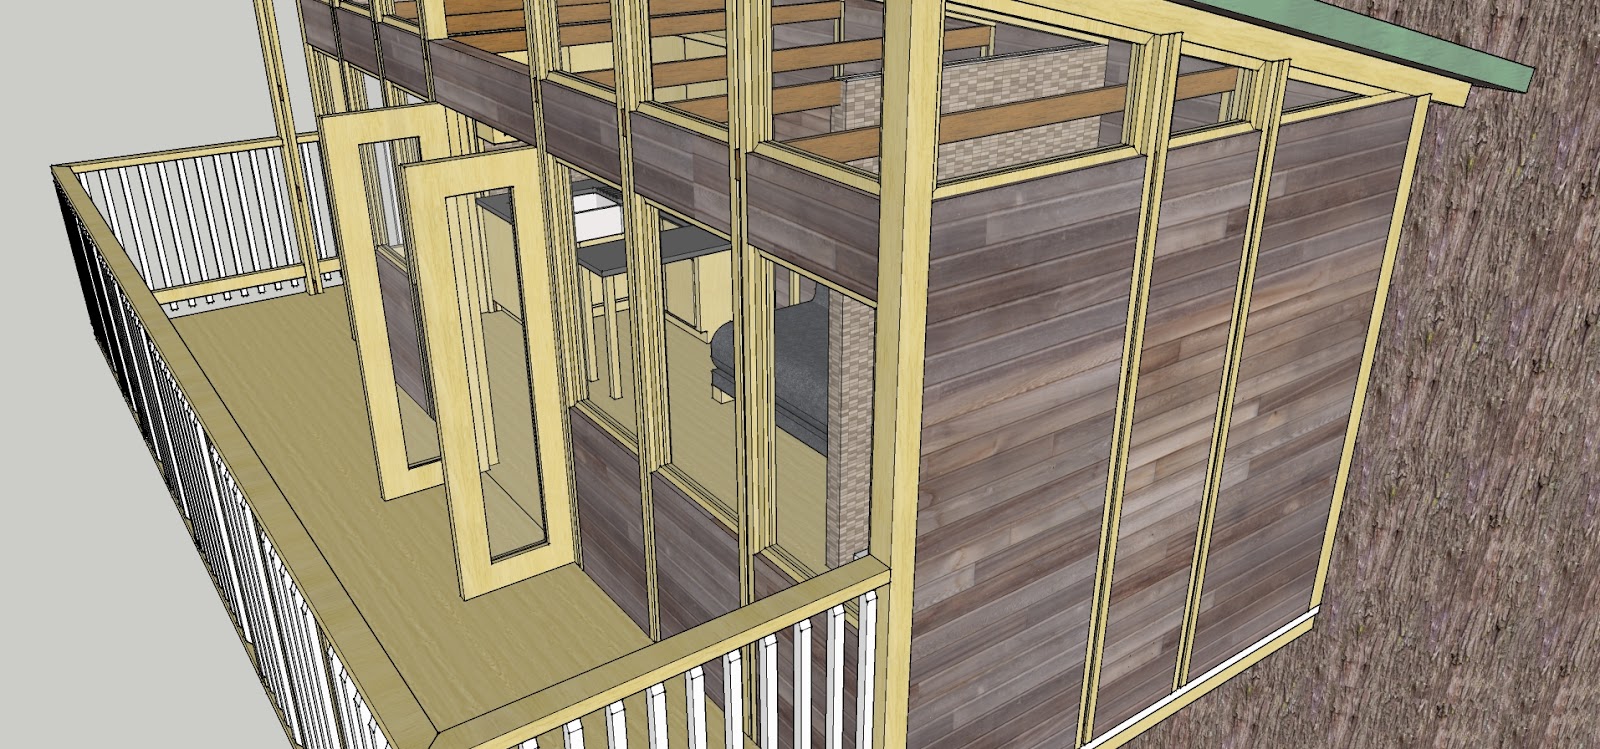
Front corner pespective

Front perspective from above

"Plan" view*
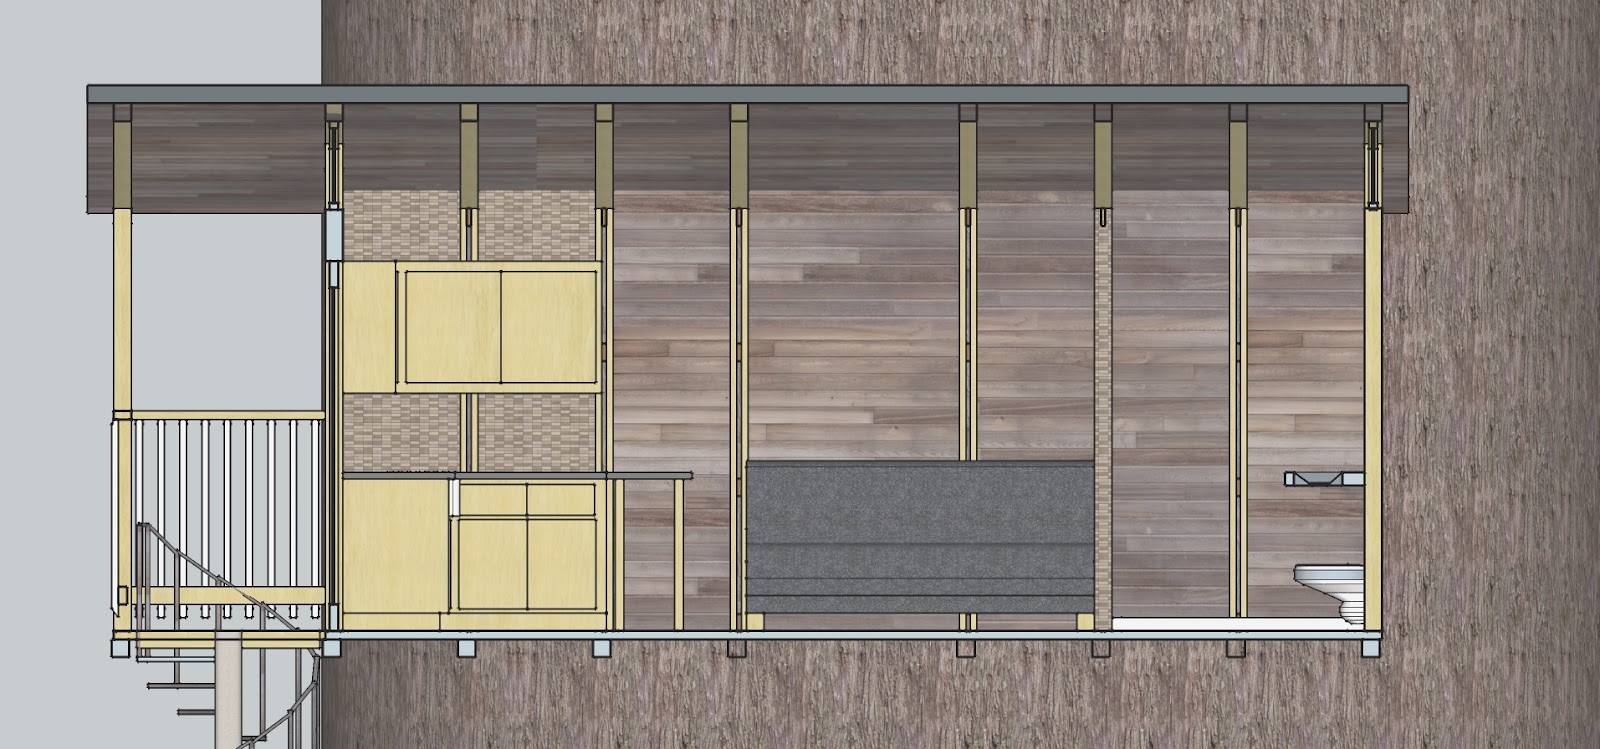
Front "Section"*
*I didn't take the time to properly set up the plan and section views.
Let me know what you think!
I got dimensions and other imforation from:
Paperstone Countertop: http://www.ecosupplycenter.com/products_countertops_paperstone.html?utm_source=Google&utm_medium=CPC&utm_campaign=Paperstone
Toilet: http://toiletdimensions.org/
Shipping Container: http://ruk.ca/content/how-big-shipping-container
Nice Big Tree: General Sherman: http://en.wikipedia.org/wiki/General_Sherman_(tree)
*PS: Working on creating separate logins to the blog so you can tell which one of us posted something - JDF.